Creating and Working with Subcontracts
A subcontract order can be linked to multiple Projects and their respective Phases and Cost Codes. This is for when the subcontractor is contracted to work on jobs across various projects, within the planned start and end dates defined on the Subcontract Order.
A project can be linked to several different subcontract orders. This would depend on the subcontractors selected to perform certain jobs, and the job schedule dates.
A subcontract can be generated with a reference to one or more phases from one or more Projects. All functionality in terms of payments and retentions is linked to the Project and its Phases and Cost Codes.
Adding New Subcontracts
This section describes how to add a subcontract and set it up so that it is ready for use. Use the Subcontract Entry application to create a subcontract.
Adding a New Subcontract
To add a new subcontract order:
-
Navigate to Subcontract Entry (Advanced Project Management > Subcontract Management > General Operations > Subcontract Entry).
-
Select New
 on the Standard toolbar.
The Subcontract Detail card appears in the main panel.
-
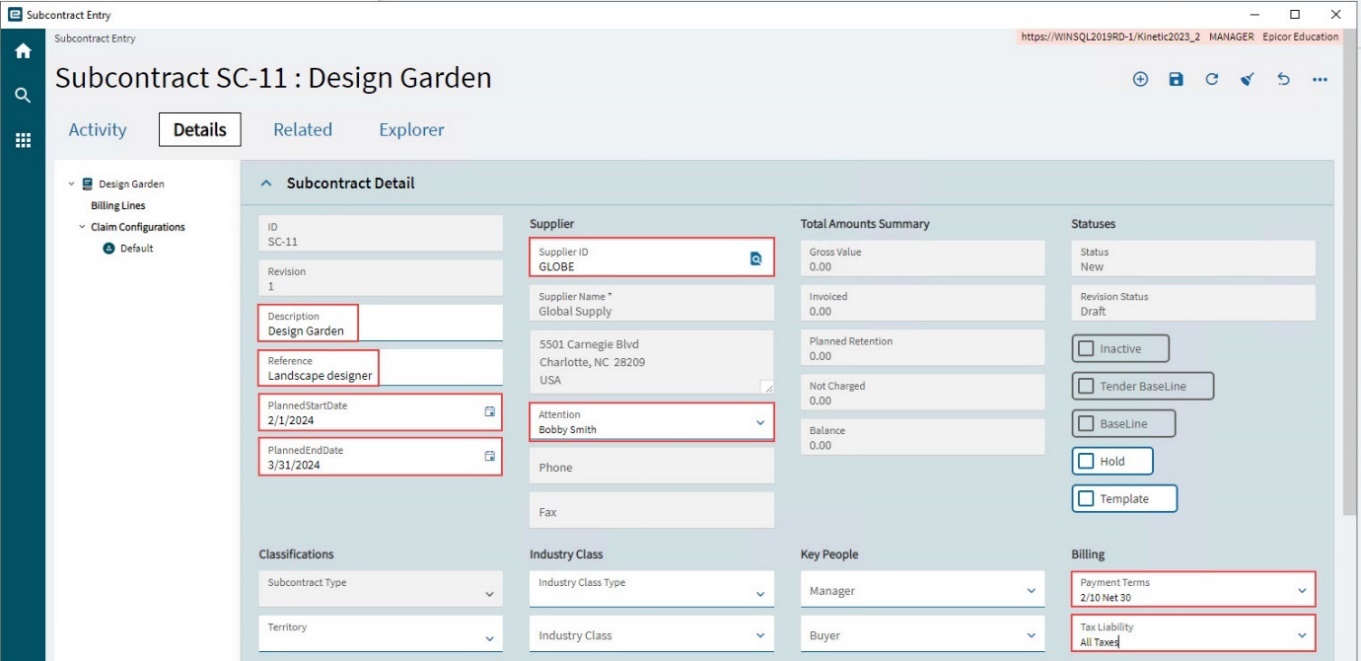
On the Subcontract Detail card, enter the following details:
-
Description, Reference, Planned Start Date and Planned End Date.
-
Search for and select a Supplier (this is the Subcontractor). When you tab out of the Supplier field, the supplier details are populated from the supplier record.
-
Select Attention from the drop-down list.
The Supplier field is not mandatory while the Subcontract revision is in the Draft status. -
The Payment Terms and Tax Liability default from the supplier’s Terms and Tax Liability. Update if required.
-
-
Select Save
 on the Standard toolbar.
 -
Add subcontract lines and order line items. See Adding Lines and Order Line Items.
-
Add GL Controls. See Adding GL Controls.
-
Select Save
on the Standard toolbar.
Duplicating a Subcontract
To create an identical copy of a subcontract:
-
Navigate to Subcontract Entry (Advanced Project Management > Subcontract Management > General Operations > Subcontract Entry).
-
Open the subcontract you want to duplicate.
-
Select Duplicate Subcontract from the Overflow
 menu.
menu. -
In the Duplicate Subcontract pop-up dialog, type in a New Subcontract ID, or leave this blank as it will auto-populate on saving.
-
Optionally add a Description and update the Start Date and choose whether to Include Inactive Line Items.
-
Select Duplicate Subcontract.
The duplicate subcontract is created with the original subcontract details retained.
-
Update the new subcontract to suit your specifications, as you would with any new subcontract (see Adding a New Subcontract).
Details Page
Adding Lines and Order Line Items
You can add Lines and Order Line Items to a subcontract from a project.
-
Add new subcontract order lines and line items: see Get Details from Project.
-
Edit the order line items, if necessary.
Get Details from Project
-
Select
 Get Details from Project from the Overflow menu.
 -
In the Get Details from Project slide-out panel dialog:
-
Search for and select a Project ID.
-
Select a Billing Type from the drop-down list.
-
Select a Milestone Set from the drop-down list.
-
Select the Phase IDs to use as Subcontract Lines.
-
Click OK.
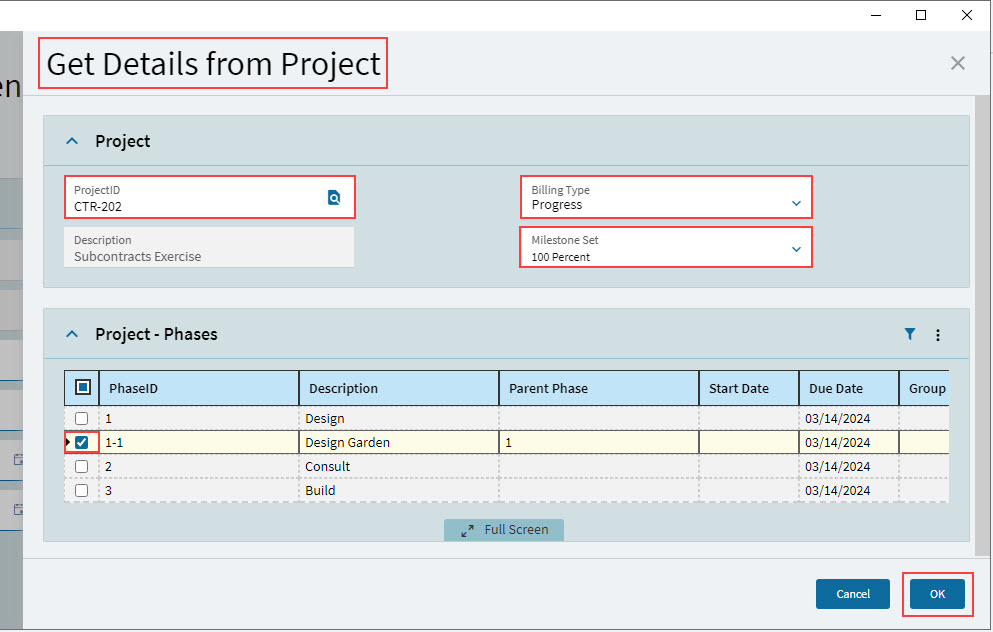
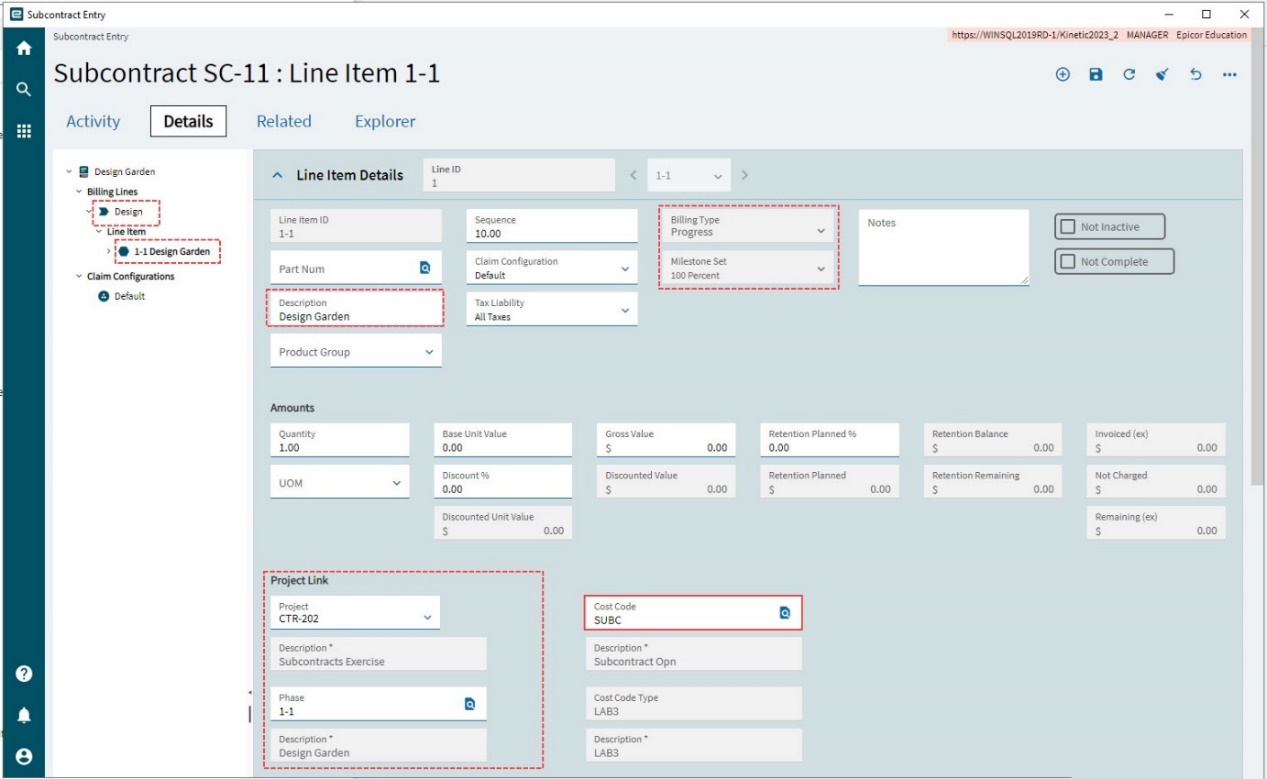
The selected phase IDs are inserted as Line Items. Their parent phases are inserted as parent Lines. Details such as Description are brought across from the linked Project > WBS Phase. The selected Billing Type and Milestone Set are used and may not be updated.
-
-
Select a Cost Code for the line item. Cost Codes for the linked Project > WBS Phase are available in the Search Results.
-
Update the Base Unit Value and Discount %. The Discounted Value is updated to the (Quantity * Base Unit Value) less the discount percent. The Discounted Value is the amount that the line item can be invoiced by the Supplier (subcontractor).

Updating Project Link
For subcontract order line items brought in from a Project, the Project and Phase are automatically inserted. You still need to select a Cost Code from the Project > Phase.
For subcontract order line items, you can select the Project, Phase and Cost Code. Only Projects that are related to the Subcontract are available for selection.
Alternatively, use the function Map Activities to Project.
Adding Claim Configurations
Claim Configurations can be set up for subcontracts, to define subcontract claiming for the subcontract line items. Each subcontract also has a Default Claim Configuration. A subcontract’s claim configurations cannot be used by another subcontract.
To add a new Claim Configuration to a subcontract:
-
Open the Details page.
-
Select Claim Configurations on the Navigation Tree.
-
Select New
on the Standard toolbar. -
Expand the Custom Claim Configuration Details card.
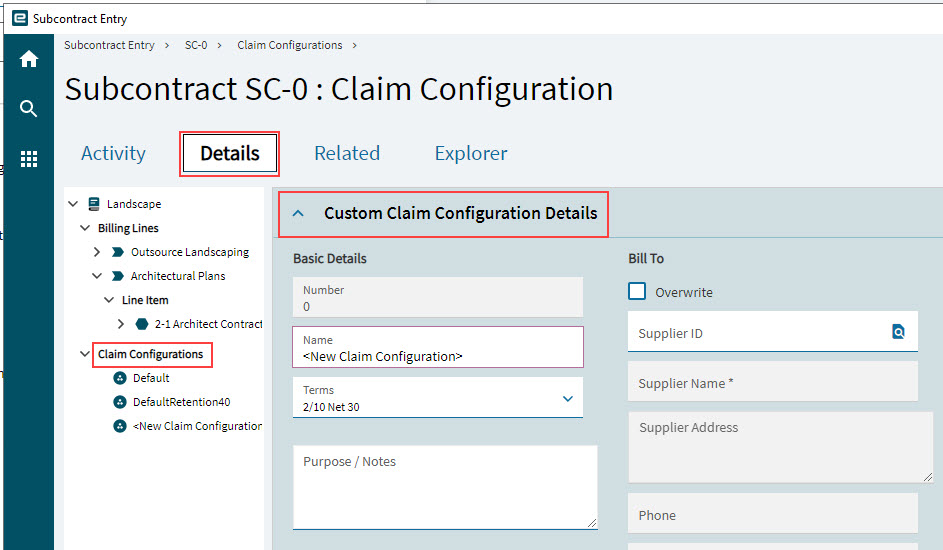
A Claim Configuration row appears on the Navigation Tree.
-
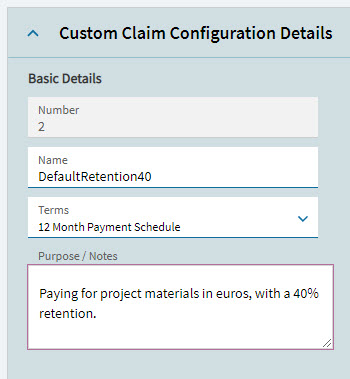
Complete the Basic Details section:
-
Name: Give the claim configuration a descriptive name.
-
Terms: Optionally select different payment terms from the drop-down. This is used as the Payment Terms for subcontract claims using this claim configuration.
-
Purpose / Notes: Use the comment box to describe what this claim configuration is intended for.
-
-
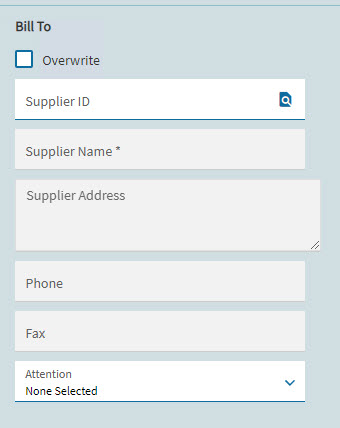
Update the Bill To section, if you want to use a different Bill To Contact for this claim configuration.
-
Select the Overwrite check box. This enables the Bill To fields.
-
Select a different Supplier ID and Attention. If you keep the Overwrite check box selected, then subcontract claims using this claim configuration will bill the claim to the selected Supplier.
-
-
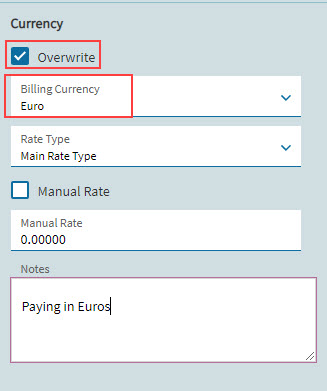
Update the Currency section, to customize currency details in the subcontract line items and subcontract claims using this claim configuration.
-
Select the Overwrite check box.
-
Optionally select a different Billing Currency from the drop-down list.
-
Optionally select a different Rate Type from the drop-down list.
-
To set a manual exchange rate, select the Manual Rate check box, then enter an exchange rate value in the Manual Rate edit box.
-
Capture notes relating to the currency settings in the Notes comment box.
-
-
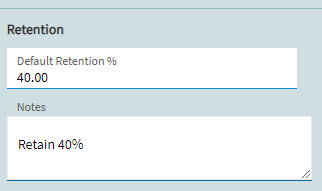
Optionally enter a Default Retention % and write a note explaining the retention percent in the Notes comment box.
-
Select Save
on the Standard toolbar.
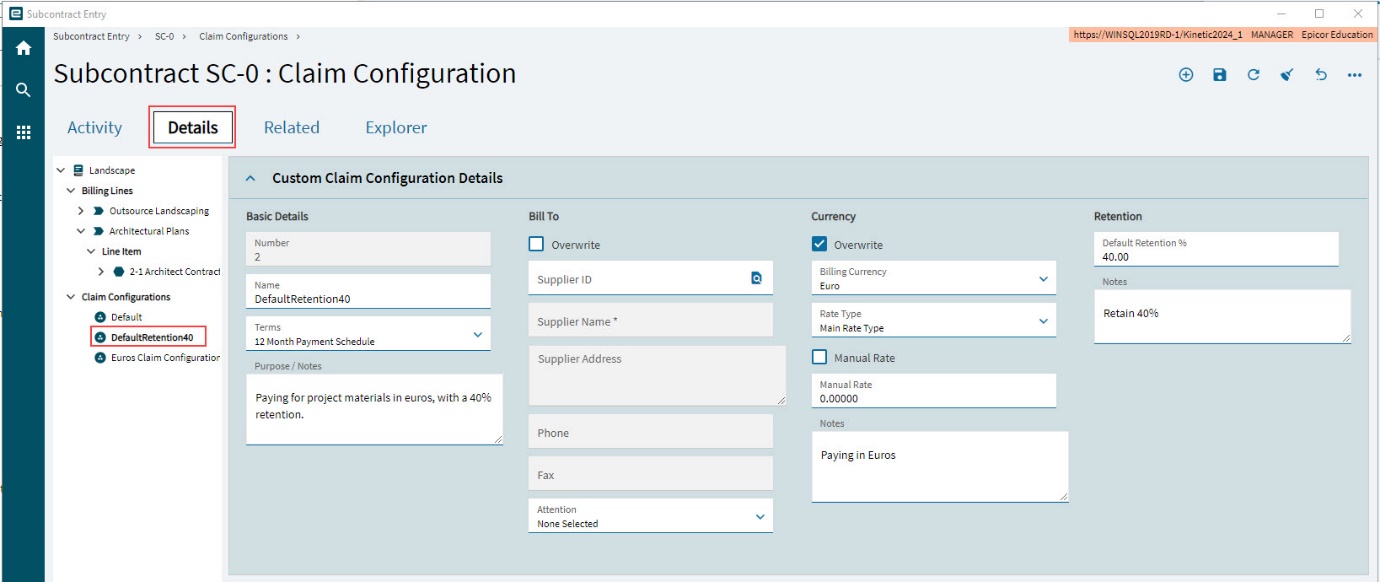
The new claim configuration is saved and appears on the Navigation Tree under the Claim Configuration node.
The new claim configuration can now be used for any of the subcontract line items. Once a claim configuration has been set for a subcontract line item, it will update certain fields on the subcontract line item and will affect how the subcontract line item is claimed.
Default Claim Configuration
The Default Claim Configuration is available for each new subcontract. To view the Default Claim Configuration, open the Details page, then select the Default claim configuration below Claim Configurations on the Navigation Tree. Expand the Custom Claim Configuration Details card.
The Default Claim Configuration is read-only, and the values are derived from the Subcontract Type and other defaults for the subcontract.
Adding GL Controls
The GL Controls selected in the Subcontract > GL Control sheet define the accounts and journal codes to use when posting transactions.
To add a new GL Control to a subcontract:
-
Open the Details page.
-
Select the subcontract at the top of the Navigation Tree.
-
Expand the Subcontract Entity GLCs card.
-
Click New GL Control on the Subcontract Entity GLCs menu bar.
A new GL Control row is inserted.
-
Select a GL Control Type from the drop-down list.
-
Select a GL Control Code from the drop-down list.

-
Select Save
on the Standard toolbar.
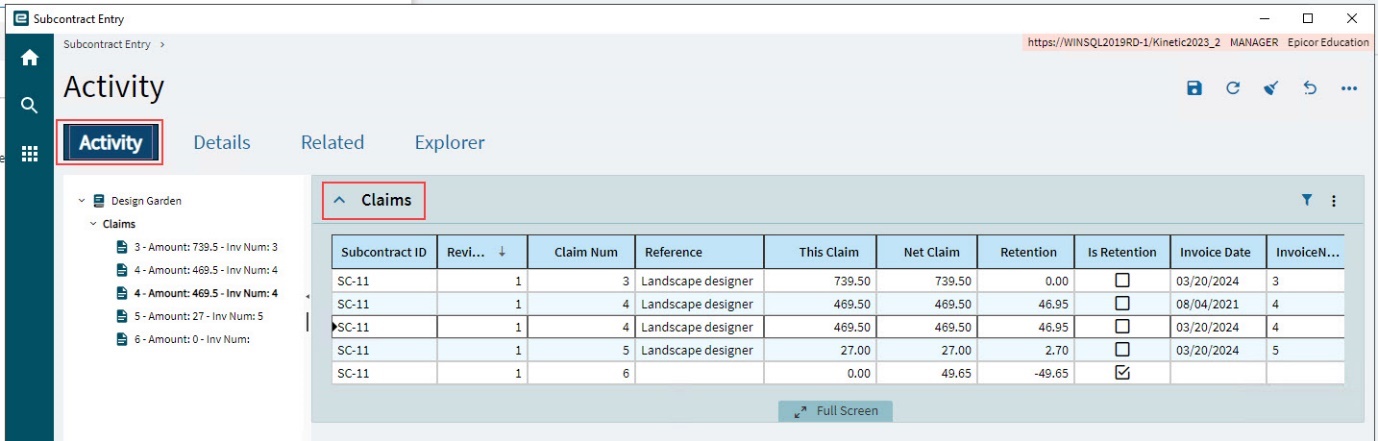
Related Page
Projects that are mapped to a Subcontract appear on the Related page in Subcontract Entry.
Linked Projects
A Subcontract Line Item will not be pulled into a Subcontract Claim unless it is linked to a Project and Project Phase. Therefore, to enable Subcontract Claiming, it is vital to have a relationship between each Subcontract line item and a Project > Phase.
Subcontract Line Items Created from Project
If subcontract line items are created from projects (see Get Details from Project), these are linked to the subcontract and appear in the Linked Projects card on the Related page.
Project Added to Subcontract
If you add a project to a subcontract (see Adding a Project to a Contract), the project is linked to the subcontract and also appears on the Linked Projects card on the Related page.