Rates Billing Exercise with Labor Rate
This example features a contract with a Rates billing type contract line item. The project relating to the rates billing contract line item has a job with operations. Employee time is captured against the job. This cost is then charged to the customer. The charge rate for labor (time) is calculated, depending on the selection in the Time Billing Details.
Follow the steps to work through the example.
Create a New Contract that uses Rates Billing
-
Add a new contract and include a contract line item that uses the Rates billing type (see Adding a New Contract). Give the Rates billing contract line item a Description and a Gross Value. Ensure the Labor Markup check box is selected. The Gross Value is the amount that will be invoiced to the customer over time.
-
Activate the contract revision (see Activating a Revision).
-
Change the contract status to Active (see Changing the Contract Status).
Add Rates to the Contract
-
Insert a Labor Rate from the Labor Rate templates or manually add a Labor Rate to the contract (see Adding Labor Rates). If you are adding a Labor Rate template, first ensure that you have Labor Rate templates set up (see Labor Rates).
In our example, we will add a Labor Rate template that is effective from 1/1/2022 and includes the Role of CONSULT with the Time Type of Regular Billing Rate.
Create Project from Contract
-
Create a project from the contract. (See Create Project from Contract). The Project Entry application opens with the new project selected.
Add Cost Code and Jobs to the Project
In the Project Entry application:
-
Create a project job for the project header (see Create Project Job). Release the Job.
-
Navigate to the WBS Phase that maps to the Contract Line Item with Rates billing type.
-
Add a new Cost Code for the Operation in the job (CNSLT in our example). See Adding Cost Codes to WBS Phases. For the cost code:
-
Enter a total value for the Draft Budget.
-
Approve the Draft Budget.
-
-
Give the WBS Phase a Start Date and a Due Date and create a job. See Updating WBS Phase - Details.
On the WBS Phase Detail card:
-
Select a Start Date.
-
Select a Due Date.
-
Create the WBS Phase job (see Create WBS Phase Job).
-
Right-click on the job and select APM Job Entry.
-
Update the WBS Phase Job
For this example, add a single operation to this job.
In Job Entry:
-
Click on Assemblies to open the Assemblies page.
-
Right-click on Operations in the tree on the left and select New Operation.
-
Select the new operation on the Navigation Tree.
This opens the new operation on the Operation card.
-
On the Job Details > Operations sheet:
-
Select an Operation from the drop-down list. In the example, this is Consulting.
-
In the Details section, enter the number of hours in the Prod Std edit box, and select Fixed Hours from the drop-down list.
-
On the Scheduling Factors tab sheet, select an Analysis Code. The Analysis Code must be linked to a Cost Code for the WBS Phase so that the job cost can be linked to the cost code and its budget, in later steps. In the example, this is Consulting.
-
-
On the Details page, select Released.
-
On the Schedule Job pop-up screen, check the schedule dates and select Ok.
-
Select Save
 on the Standard toolbar.
| For further help with capturing job details, refer to the standard Kinetic Help on Job Entry. |
Capture and Submit a Timesheet
-
Enter a Time Sheet against the Job operation. (See APM Time Entry). Save and Submit the Time Detail. This creates a Labor Cost and a Burden Cost against the project.
Capture COS/WIP Activity
Run the Capture COS/WIP Activity process with Post Cost of Sales / MFG Variance selected. This will move the submitted and approved timesheet into a Labor Cost WIP and Burden Cost WIP for the Project, after which the cost can be claimed from the customer.
Recalculate Analysis
-
Return to the Project in APM Project Entry.
-
Run Recalculate Analysis to bring in the new transactions. See Running Recalculate Analysis.
-
Refresh
 the project.
 -
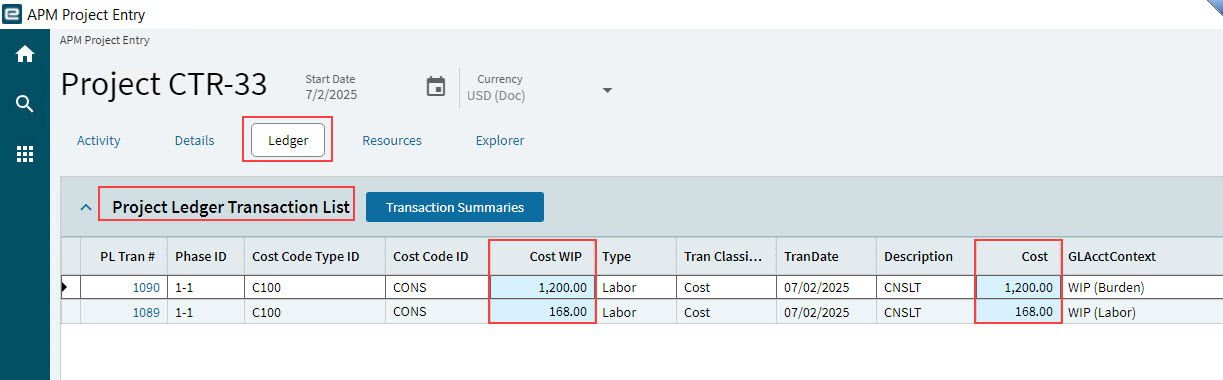
Note the changes on the Ledger page:
-
The transactions appear on the Project Ledger Transaction List card.
-
-
Note the changes on the Details page:
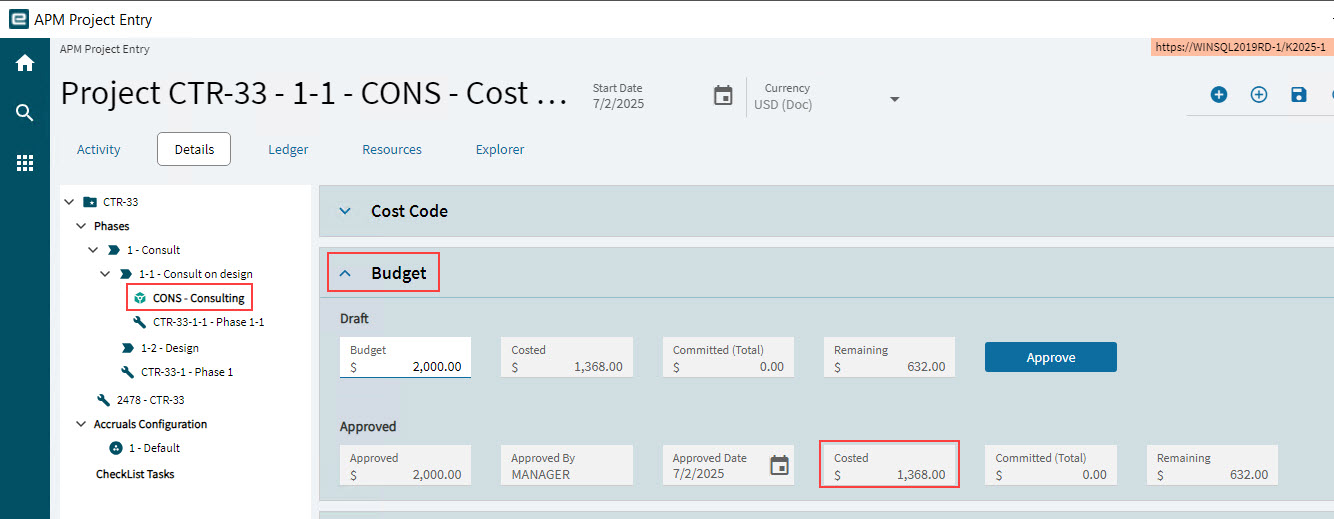
Select the Cost Code from the Navigation Tree.
-
On the Budget card, the total for the latest transactions is added to the Costed value.
-
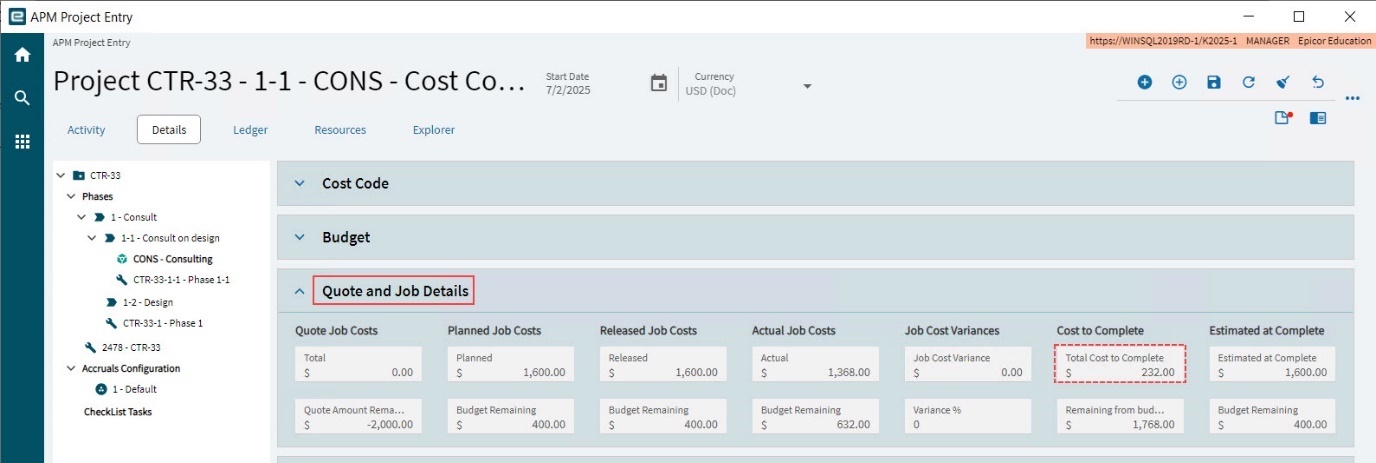
On the Quote and Job Details card, the transaction total appears in the Actual Job Costs.
Note the changes on the Ledger page:
-
The COST WIP transactions appear on the Project Ledger Transaction List card.
Note the changes on the Transaction Summaries page (see Transaction Summaries):
-
The sum of transactions appears as a Costed value on the Cost Type Summary card.
-
The transactions appear as Cost WIP on the Cost Type Transaction Detail card.
-
Add a Contract Claim
-
Add a contract claim for the contract (see Entering a Contract Claim).
-
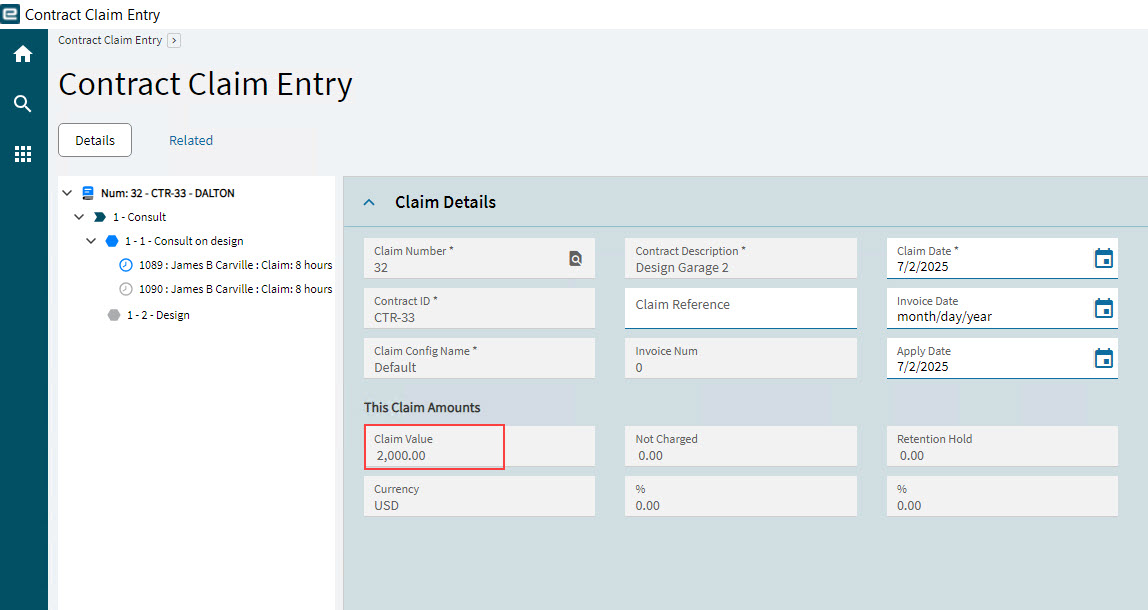
Review the contract claim line items. On the Time Billing Details card for time cost, the Total Billable / Invoice Amount Hours is used (see how to adjust this value in Updating Time Billing Details).
This amount appears on the Claim Details card as the Claim Value.
-
Submit and Approve the Contract Claim (see Submission and Approval) and generate an A/R Invoice (see Generate an AR Invoice).
-
Right-click on the Invoice Num in Contract Claim Entry, to open the invoice in APM AR Invoice Tracker. Check to see that the invoice is Posted.
Recalculate Analysis
-
Return to the Project in APM Project Entry.
-
Run Recalculate Analysis, to bring the posted transactions into the Project Ledger (see Running Recalculate Analysis).
-
Refresh
the project.
On the Transaction Summaries page:
-
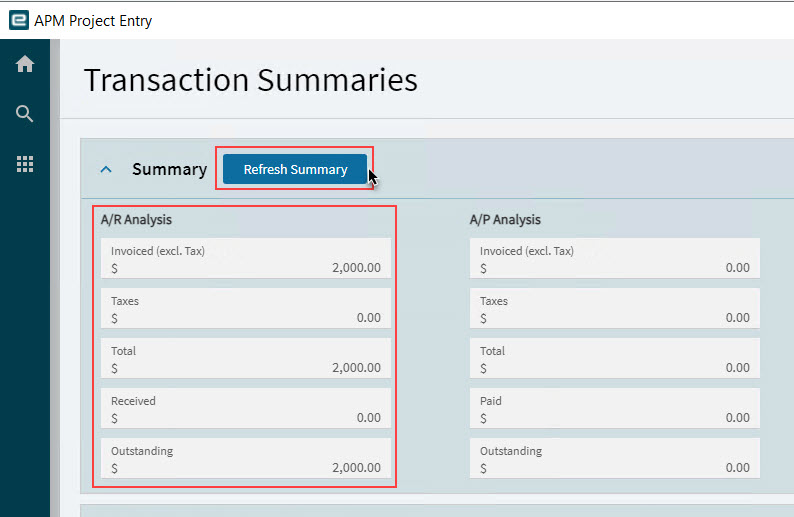
On the Summary card, click Refresh Summary. The total invoice amount is included in the AR Analysis.