APM AP Invoice Entry
Use APM AP Invoice Entry to enter Accounts Payable Invoices which are to be charged directly to Project/Phase and Cost Code in APM Projects. The instructions below show how to create a miscellaneous invoice with lines. Use the same approach when capturing other types, such as Advance Billing, Credit Memos, and so on.
| After an APM AP Invoice is entered, you can View the APM AP Invoice Transaction in the APM Project. |
|
All other features and functionality of APM AP Invoice Entry are the same as the standard AP Invoice Entry accessible from other menu paths in Kinetic. For further information on capturing an AP Invoice, refer to the standard Kinetic Help topic Entering AP Invoices in the Accounts Payable module (Invoices). |
To capture an APM AP Invoice for a Project:
-
Navigate to Advanced Project Management > Project Accounting > General Operations > APM AP Invoice Entry. Open APM AP Invoice Entry.
-
Add a new invoice group.
-
Select New Group
 on the Group card menu bar to add a new invoice group.
 -
Type a group identifier into the Group edit box.
-
Select an Apply Date.
-
Select Save Group
 on the Standard toolbar.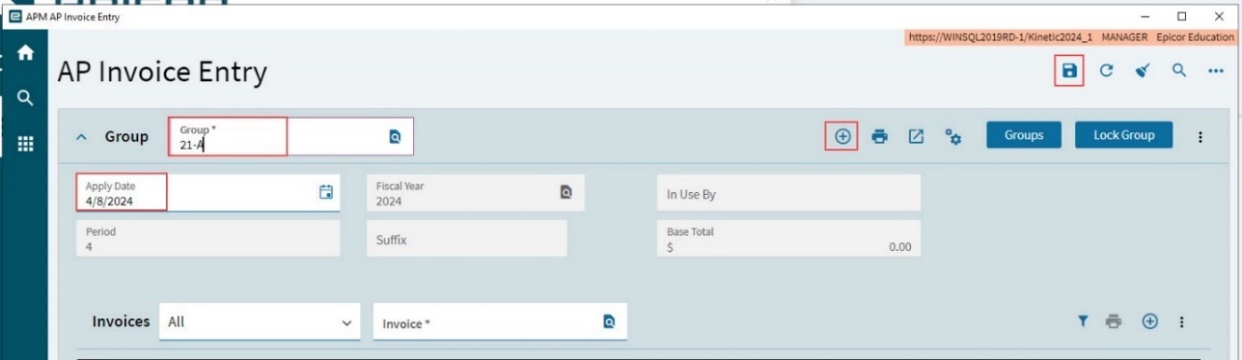
-
-
Add a new invoice.
-
Select Invoice
on the Invoices section menu.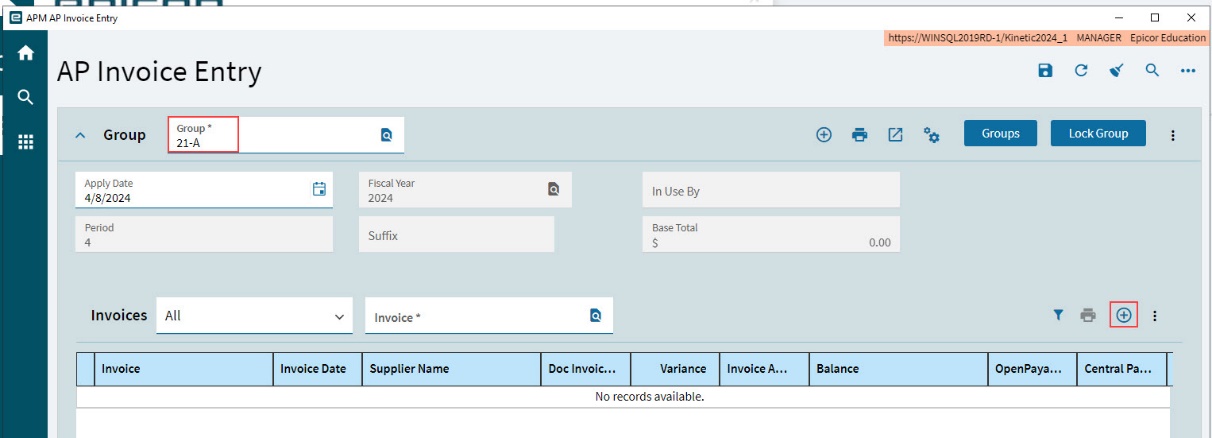
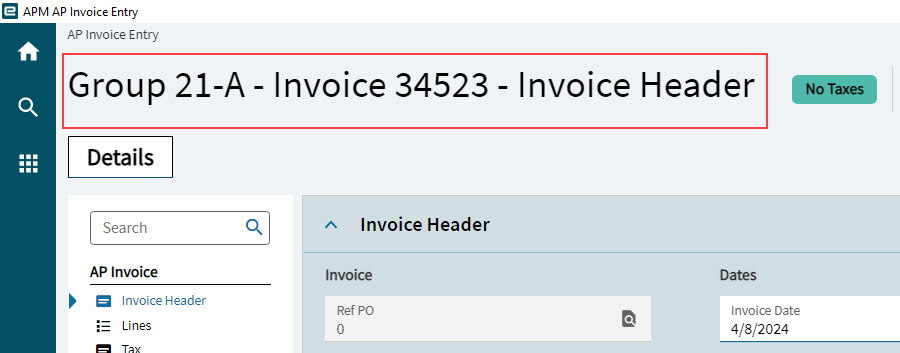
A new invoice is created and displayed, with the Invoice Header card expanded.
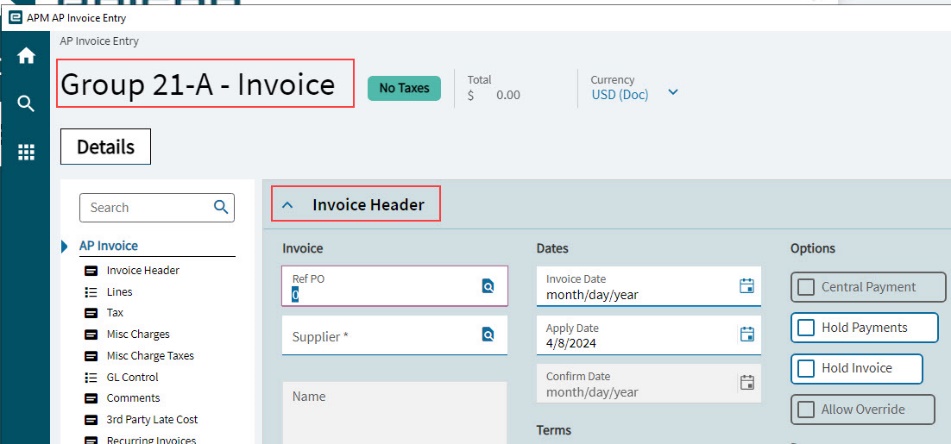
-
-
Complete the Invoice Header.
-
Select a Supplier. This could be an employee, for example if you were reimbursing them for project expenses.
-
Enter an Invoice number. This will be the invoice number from the supplier.
-
Enter the invoice Amount.
-
Select an Invoice Date.
-
Enter a Description.
-
Select Terms.
-
Select a Payment Method.
-
Select all other defaults.
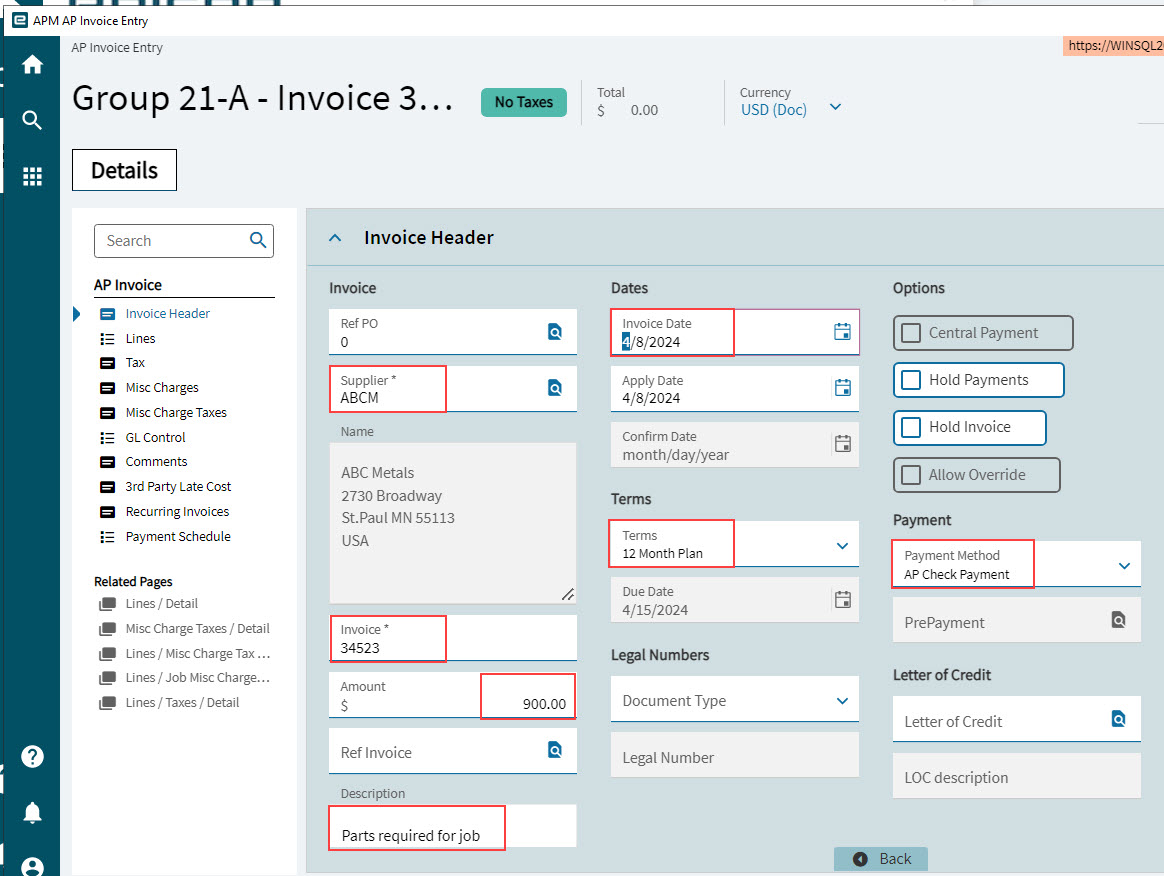
-
-
Select Save
on the Standard toolbar.The new invoice is saved.
-
Add an Invoice Line.
-
Select Lines on the Navigation Tree.
-
Select Misc Line
on the Lines menu bar.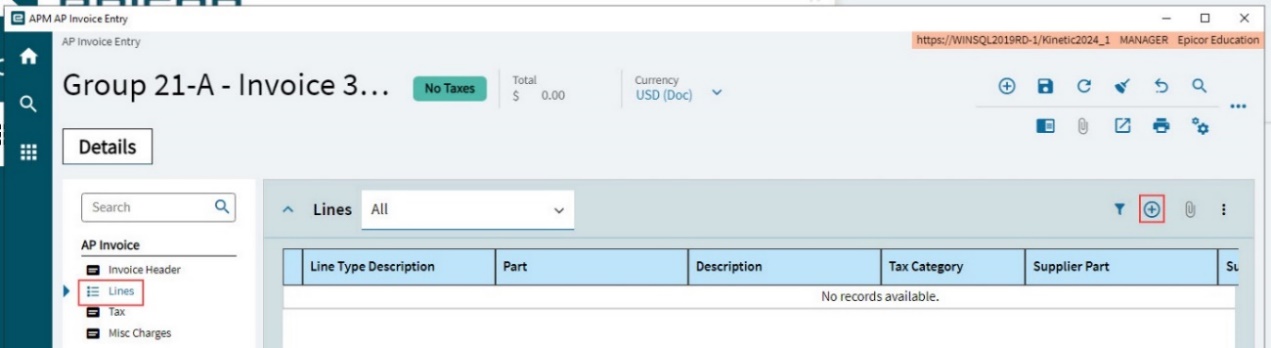
A new invoice line is created.
-
-
Select the Line Type Description to edit the Line.
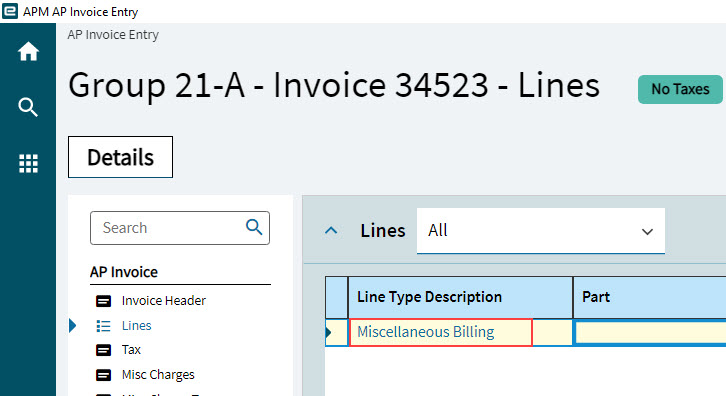
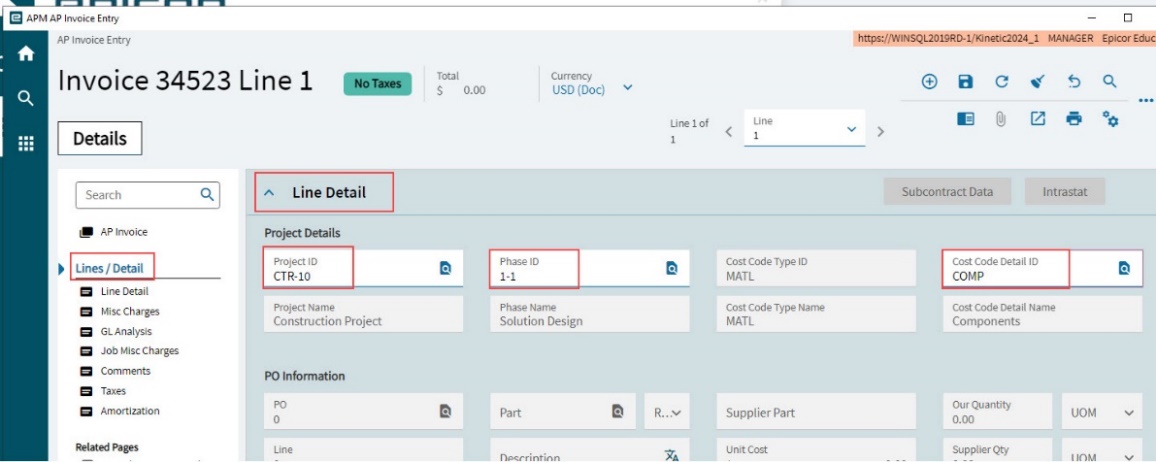
The Lines/Detail appears on the Navigation Tree, with the Line Detail card expanded.
-
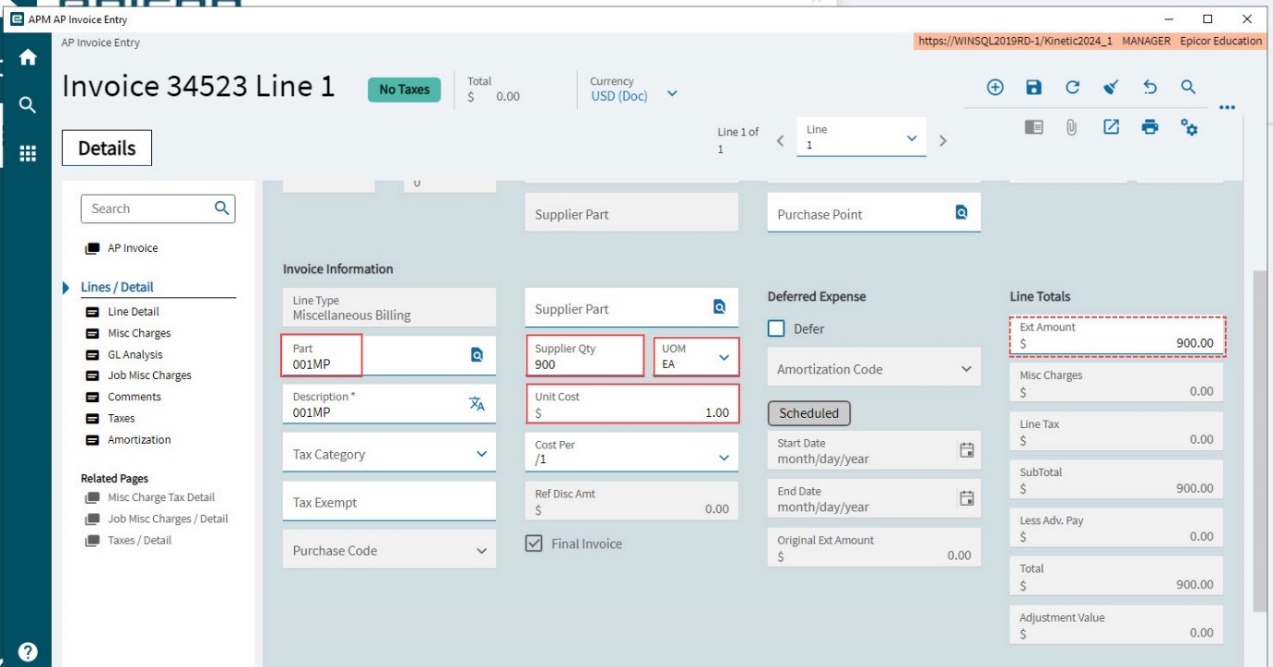
In the Project Details section, select a Project ID, Phase ID, and Cost Code Detail ID.
-
Scroll down to the Invoice Information section on the lower half of the card.
-
Select a Part.
-
Enter a Supplier Qty and UOM.
-
Update the Unit Cost if necessary.
The Ext Amount in the Line Totals section is updated.
-
-
Select Save
on the Standard toolbar. -
Continue to add invoice lines, as required.
-
Continue to add invoices to the group, as required.
-
Check the invoice header.
-
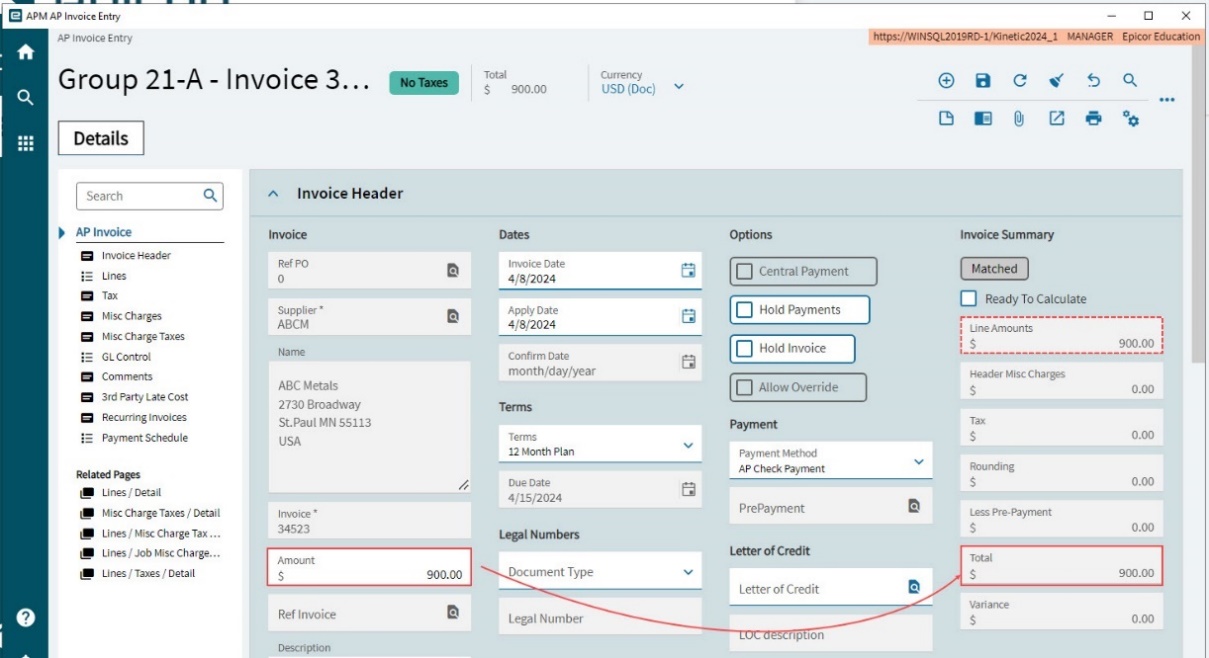
Select AP Invoice on the Navigation Tree.
The Line Amounts is the sum of the Ext Amount for the invoice lines.
-
Check that the Total is equal to the Amount.
-
-
Post the Group.
-
Select Group Post
 on the standard menu.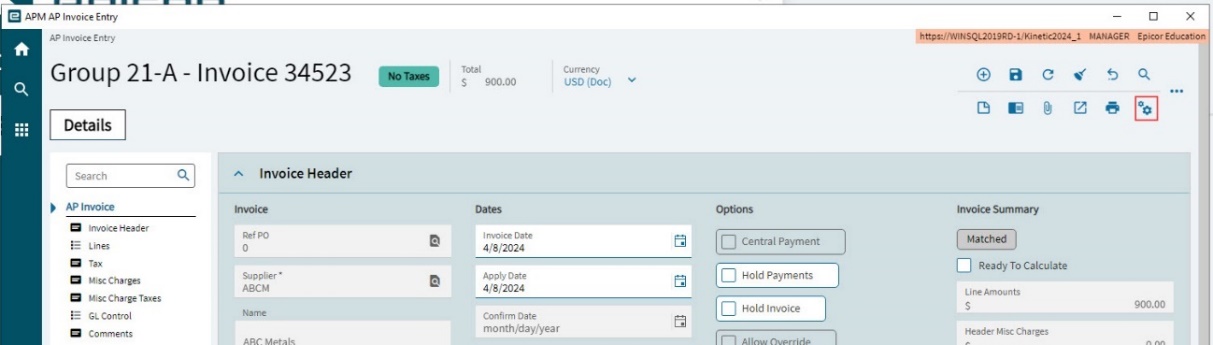
-
Select Process
on the AP Invoice Post Process slide-out panel.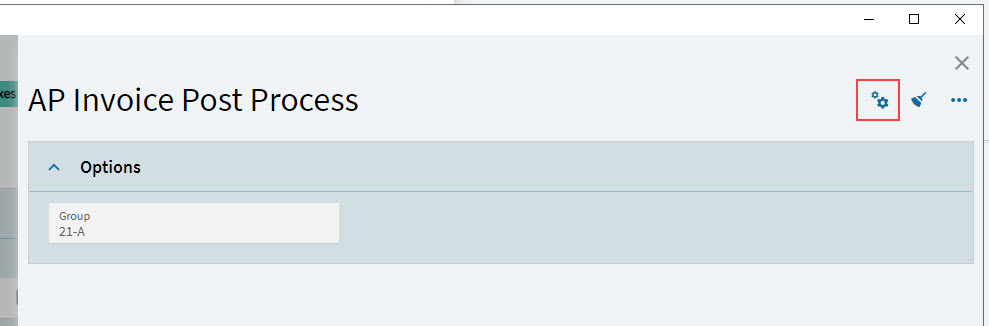
The process is submitted.
-
Close the AP Invoice Post Process slide-out panel.
-
Viewing the APM AP Invoice Transaction in the APM Project
| Because this is a direct AP expense (not an expense against a Job), there is no requirement to run the Capture COS/WIP Activity to see the AP Invoice. |
-
Open the project used in an invoice line.
-
Run Recalculate Analysis.
You will see the effect of the APM AP Invoice on the Budget for the Project > Phase > Cost Code (see Budget for a Cost Code).
-
The Costed value increases by the AP Invoice amount.
-
The Remaining value decreases by the AP Invoice amount.
In the Project Ledger Transaction List:
-
The transaction appears in the Project Ledger Transaction List (see Ledger Page). The values appear in the Cost and Spent columns.
In the Transaction Summaries:
-
The Invoiced (excl. Tax) and the Total in A/P Analysis increase by the AP Invoice amount.
-
The transaction appears in the Cost Type Transaction Detail.
-
The List (Accounts Payable) shows the AP Invoice transaction.