APM Case Entry
Use APM Case Entry to enter Cases which can relate directly to Project/Phase/Job/Assembly Sequence/Operation in APM Projects. You can also enter Contract and Contract Claim information in the APM Case, and also Related Information, which is available in standard Case Entry.
Standard Case Entry allows you to capture related information for any of the following, for example:
-
Sales Order
-
Quote
-
RMA
-
Invoice
-
Part
-
Marketing
| For further information, refer to the standard Kinetic Help topic Creating Cases in the Case Management module. |
Opening Existing Cases
-
Navigate to Advanced Project Management > Project Accounting > General Operations > APM Case Entry.
APM Case Entry opens.
-
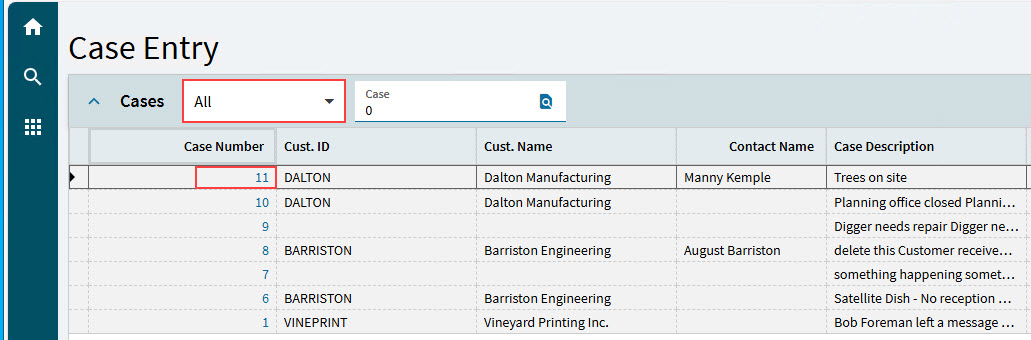
Filter the cases by choosing from the drop-down on the menu bar. Choose:
-
All
-
Open
-
Closed
-
Or Recent Records
-
-
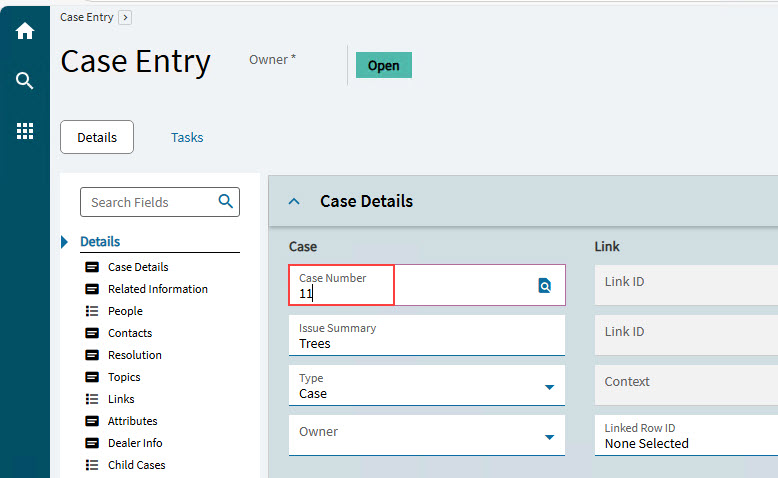
Select a Case Number to open the case.
The selected case appears in Case Entry.
Adding New Cases
-
Navigate to Advanced Project Management > Project Accounting > General Operations > APM Case Entry.
-
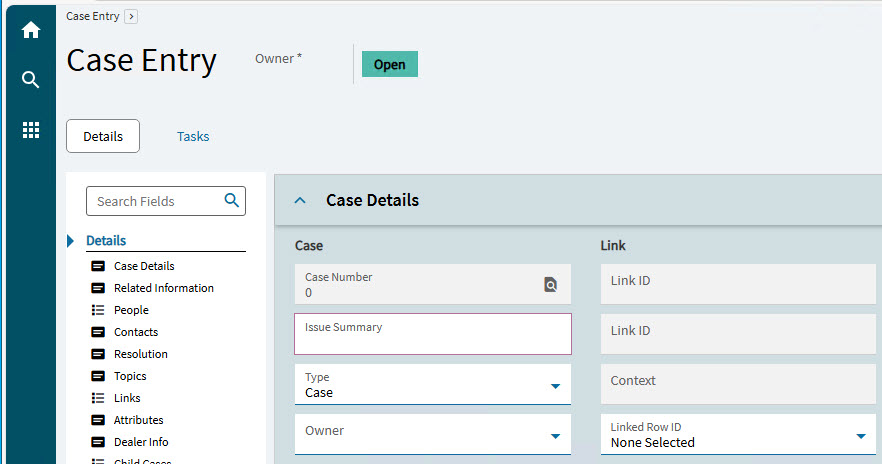
Select New
 on the Standard toolbar.
Case Entry opens for a new case.
-
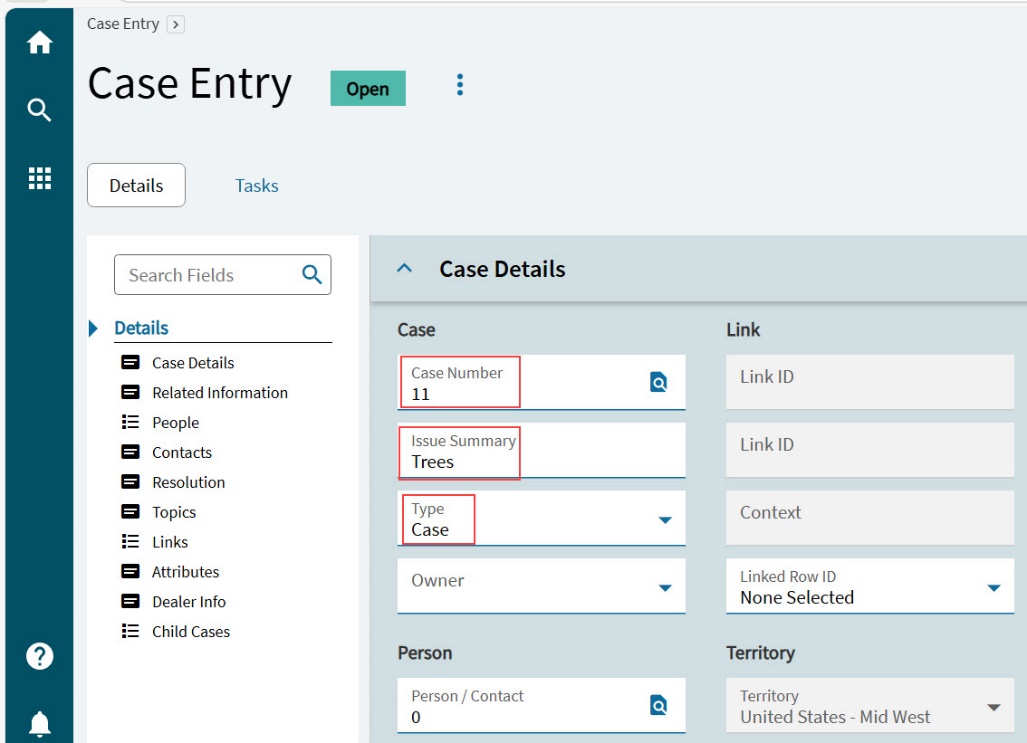
On the Case Details card, enter the case details:
-
Enter an Issue Summary, summarizing what the case is about.
-
Select a Type from the drop-down list. The default here is Case.
ECO - Select this case type, then choose an ECO Workflow Group.
Case - Select this case type, then choose a Case Management Workflow Group.
CRM - Select this case type to enter a CRM case. When selected, the Customer field is mandatory and the Workflow Group option is not available.
-
Optionally select an Owner for the case.
-
Optionally select a Contact Person. This fills in the Link details.
-
Optionally enter a Priority.
-
If this case is part of another case, select the other case as the Parent.
-
Enter a Full Description for the case, outlining the issue as well as any actions to be taken before the case can be closed.
-
Select a Workflow Group if this case is of type ECO or Case. Active Workflow Groups for the selected Type are available. (These are maintained in Workflow Group Maintenance in standard Kinetic.)
-
Select a Task Set. Tasks Sets for the select Type are available. (These are maintained in Task Set Maintenance in standard Kinetic.)
-
-
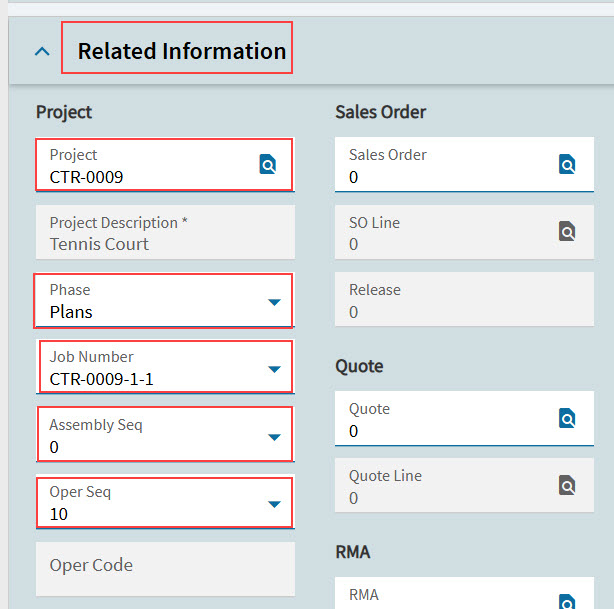
Expand the Related Information card and complete all relevant information. For Advanced Project Management, fill in information relating to Projects and/or Contracts and Contract Claims.
-
To capture Project information, enter the following:
-
Select a Project.
-
Select a Phase for the selected Project from the drop-down list.
-
Select a Job Number from the drop-down list.
-
Select an Assembly Seq from the drop-down list.
-
Select an Oper Seq (Operating Sequence) from the drop-down list.
-
-
Save.
The case appears on the Help Desk card of the selected Project.
-
-
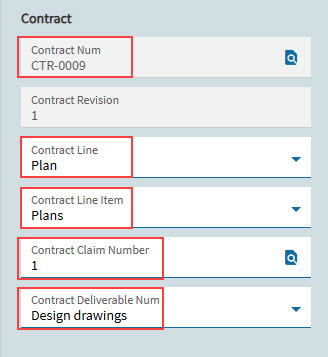
Optionally enter Contract and Claim details.
-
Select a Contract Num.
-
Select a Contract Line.
-
Select a Contract Line Item.
If the case also relates to a specific contract claim, then select the details here.
-
If the case also relates to a specific contract claim, select a Contract Claim Number.
-
Optionally select a Contract Deliverable Number.
-
-
Next, complete the definitions for the Tasks for the case.
Tasks are inserted automatically, depending on which Task Set you select for the case. Each Milestone from the Task Set is entered as a Task for the Case.
You should update the task details when first setting up the case and then continue to make adjustments as you work through each task. For example, set up the Assigned To, Start Date and End Date initially, then update % Complete as you work through the task. To update the task definitions:
-
Open the Tasks page.
-
Select the first task on the Navigation Tree.
-
Update the Task Detail card:
-
Optionally update the Description.
-
Optionally update the Task Type.
-
Select Send Alert at Completion to send a global alert when the task is marked as Complete.
-
Select Mandatory for tasks that must be completed.
-
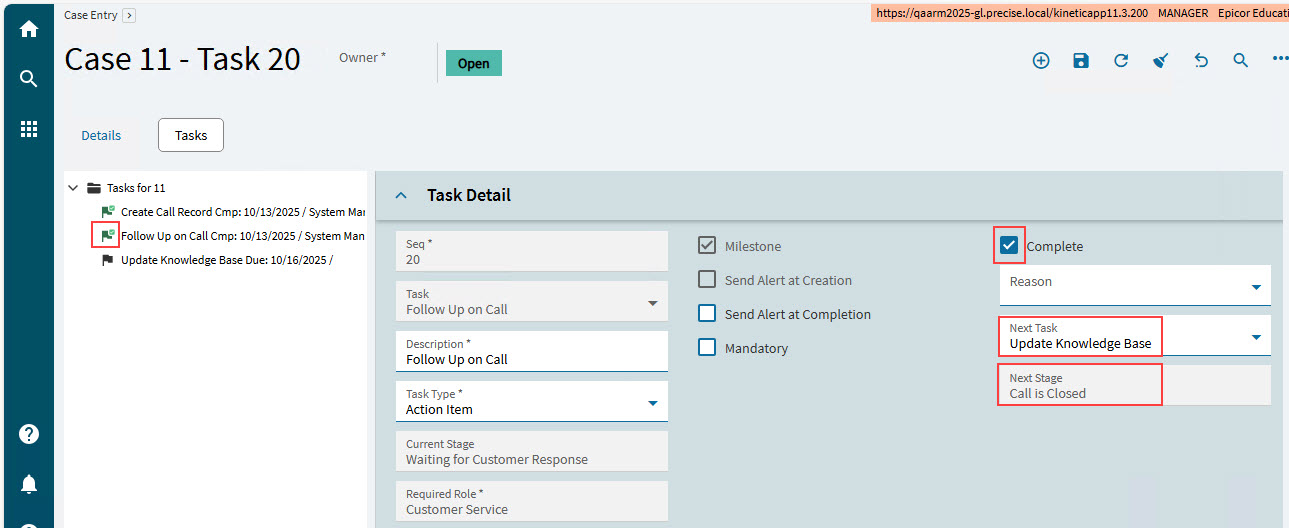
When the Task is complete, select Complete and optionally select a Reason.
-
-
Update the General tab on the Task Details card:
-
Select an Assigned To. This is the person the task is assigned to.
-
Optionally select an Internal Contact. This is the person that needs to be contacted to complete the task.
-
Optionally give the task a Status (for example, select High Priority, or In Process).
-
Update the Start and End dates and times.
-
Optionally enter a Priority and % Complete.
-
-
Update the Customer tab on the Task Details card:
-
The Sold To Customer and Ship To default to the selected Customer in Contacts.
-
-
Update the Supplier tab on the Task Details card:
-
Update the Comments tab on the Task Details card. Enter and save any comments relevant to the task.
As each task is completed, the flag icon on the Navigation Tree turns dark green, with a light green tick. The Next Task and Next Stage in Task Detail update to the next task and in the Navigation Tree and its stage, as defined in the Task Set.
-