APM AR Invoice Entry
Use APM AR Invoice Entry to enter Accounts Receivable Invoices.
|
All other features and functionality of APM AR Invoice Entry are the same as the standard AR Invoice Entry, accessible from other menu paths in Kinetic. For further information on capturing an AR Invoice, refer to the standard Kinetic Help topic Entering AR Invoices in the Accounts Receivable module (Invoices). |
Creating and Posting APM AR Invoices
The instructions below show how to create a miscellaneous invoice with lines. Use the same approach when capturing other types, such as Advance Billing, Credit Memos, and so on.
-
Create a new Invoice Group: see Capturing an Invoice Group.
-
Capture an APM AR Invoice: see Capturing an APM AR Invoice.
-
Post the invoice.
You can also use APM AR Invoice Entry to post an existing, unposted APM AR Invoice. For example, a Contract Claim invoice that was not auto posted. (Auto posting of Contract Claim Invoices and Credit Memos are controlled by the setting AutoPostClaimARInvoices in APM Configuration – see Configuration Details).
To post a Contract Claim Invoice:
-
Select the invoice. See Selecting an APM AR Invoice.
-
Post the invoice group.
Capturing an Invoice Group
-
Navigate to Advanced Project Management > Project Accounting > General Operations > APM AR Invoice Entry OR
Navigate to Advanced Project Management > Contract Management > General Operations > APM AR Invoice Entry.
-
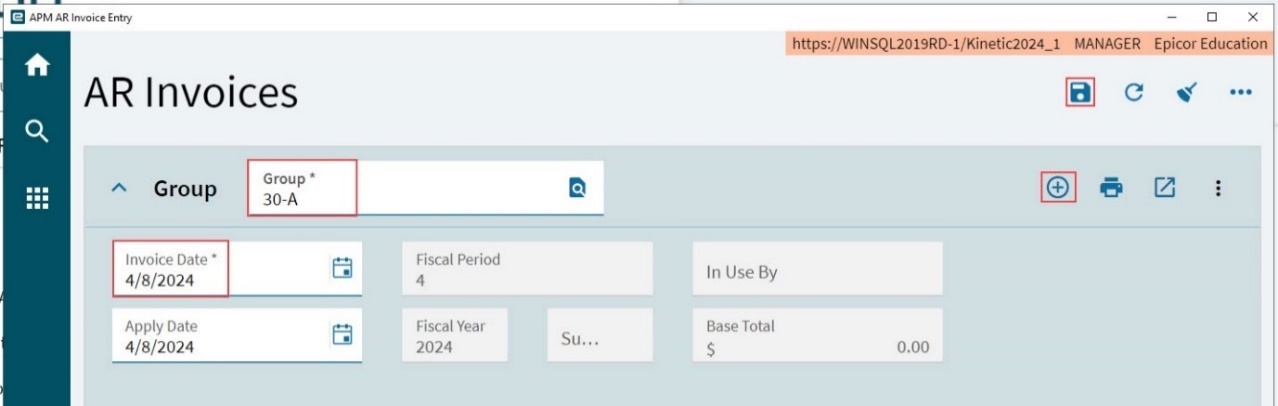
Add a new invoice group.
-
Click New Group
 on the Group card menu bar to add a new invoice group.
 -
Type a group identifier into the Group edit box.
-
Select an Invoice Date.
-
Select Save Group
 on the Standard toolbar.
-
Capturing an APM AR Invoice
-
Enter or select a Group on the Group card or add a new invoice group.
-
Add a new invoice. Select New Miscellaneous Invoice
on the Invoices section menu.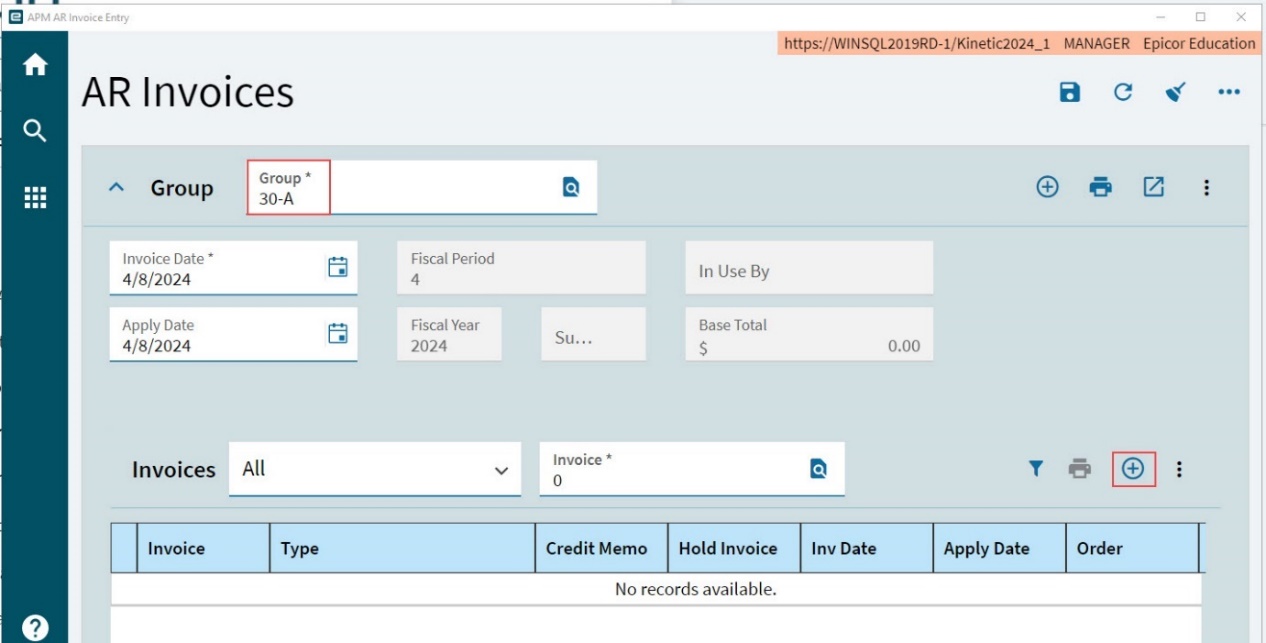
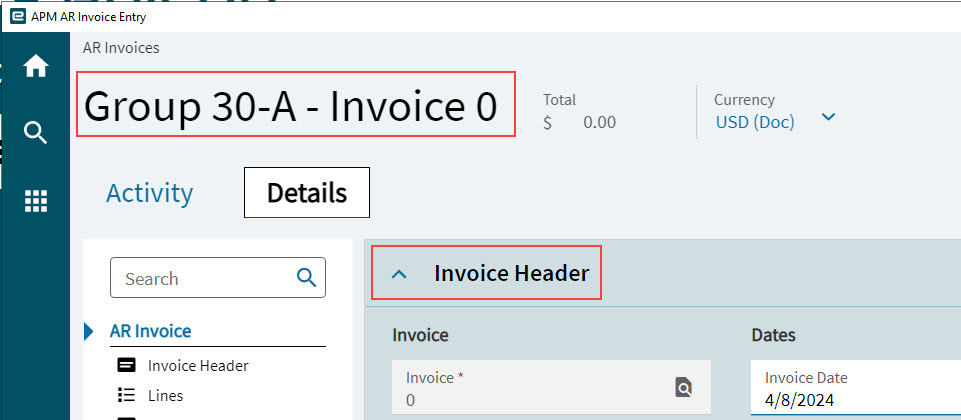
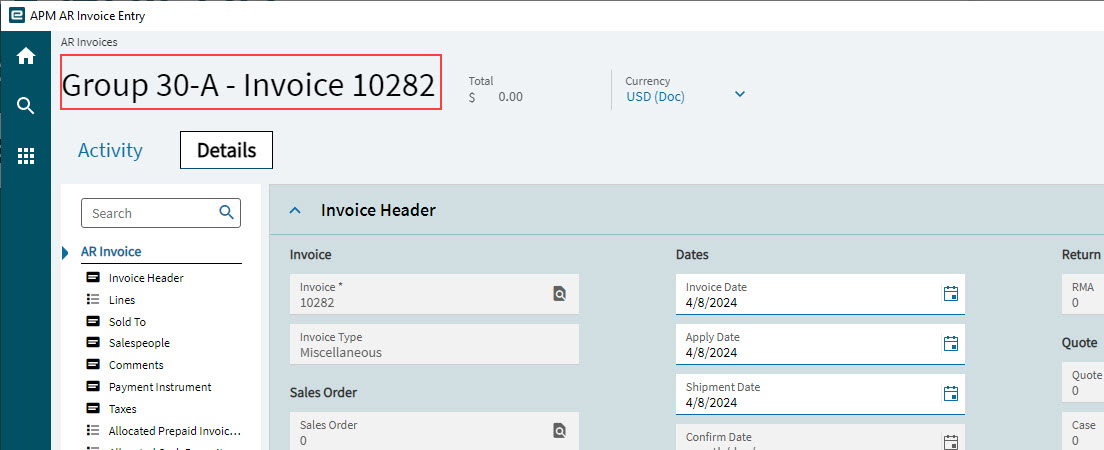
A new invoice is created and displayed, with the Invoice Header card expanded.
-
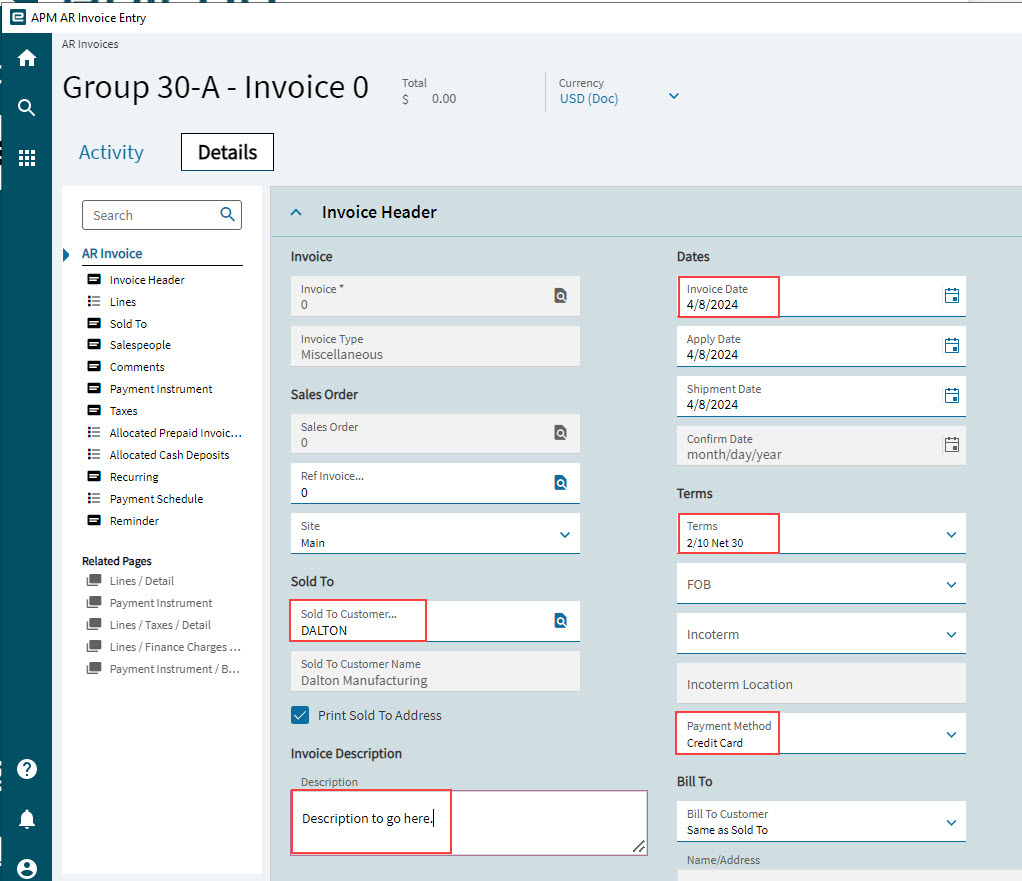
Update the Invoice Header.
-
Select the Sold To Customer.
-
Enter a Description.
-
Select an Invoice Date.
-
Select Terms.
-
Select a Payment Method.
-
-
Select Save
on the Standard toolbar.The new invoice is saved.
-
Add an Invoice Line.
-
Select Lines on the Navigation Tree.
-
Select New Line
on the Lines menu bar.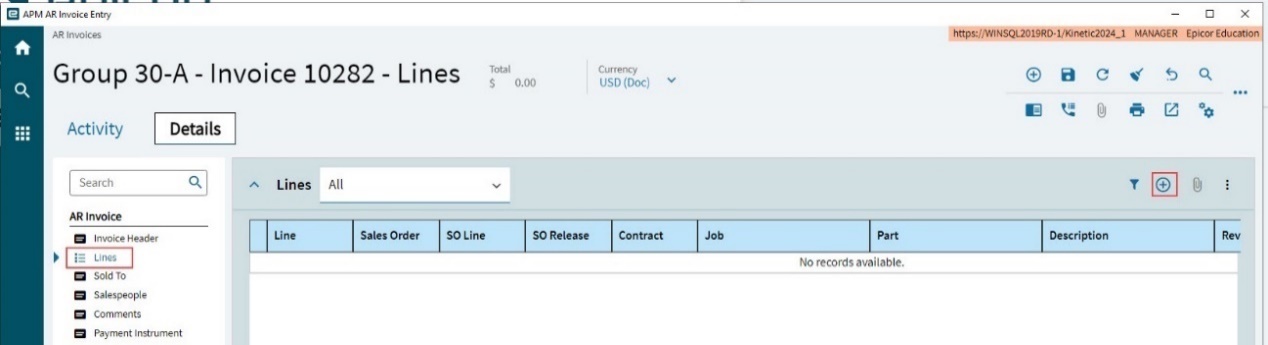
A new invoice line is created.
-
-
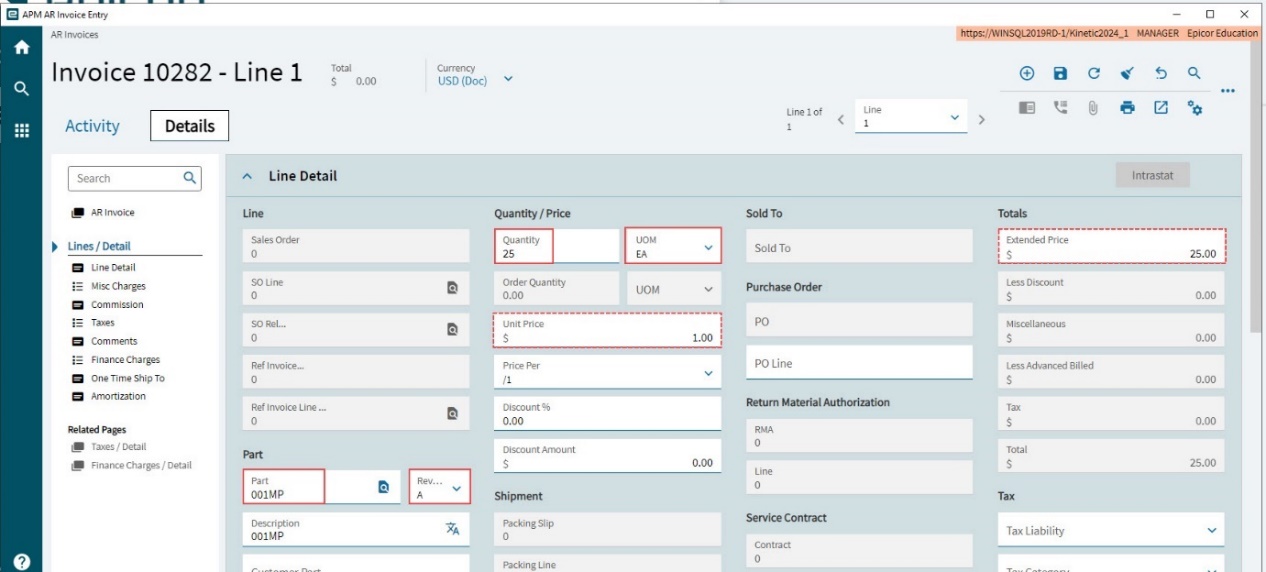
Update the Line Detail.
-
Select a Part and Revision.
-
Enter a Quantity and UOM.
-
Update the Unit Cost if necessary.
-
Keep all other defaults.
-
Save the line.
The Extended Price in the Line Totals section is updated.
-
-
Enter more lines if required.
-
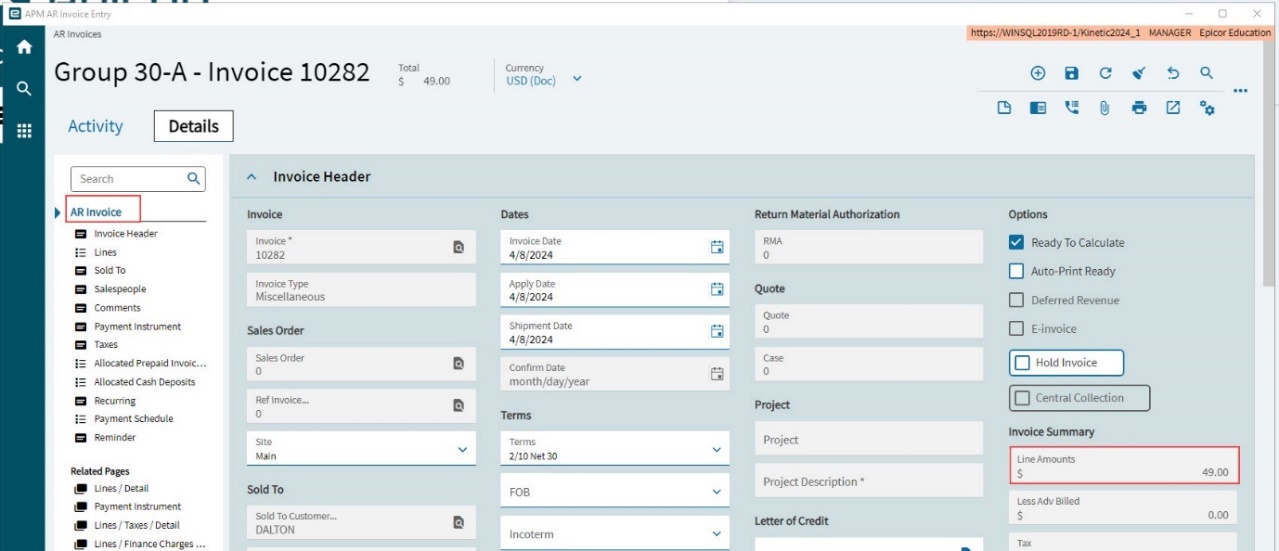
Check the Line Amounts on the Invoice Header card. This should match the sum of the Extended Price from all Lines.
-
Select Save
on the Standard toolbar.
Selecting an APM AR Invoice
-
Navigate to Advanced Project Management > Project Accounting > General Operations > APM AR Invoice Entry OR
Navigate to Advanced Project Management > Contract Management > General Operations > APM AR Invoice Entry.
-
Enter or an Invoice number and tab out, or search
 and select an invoice number.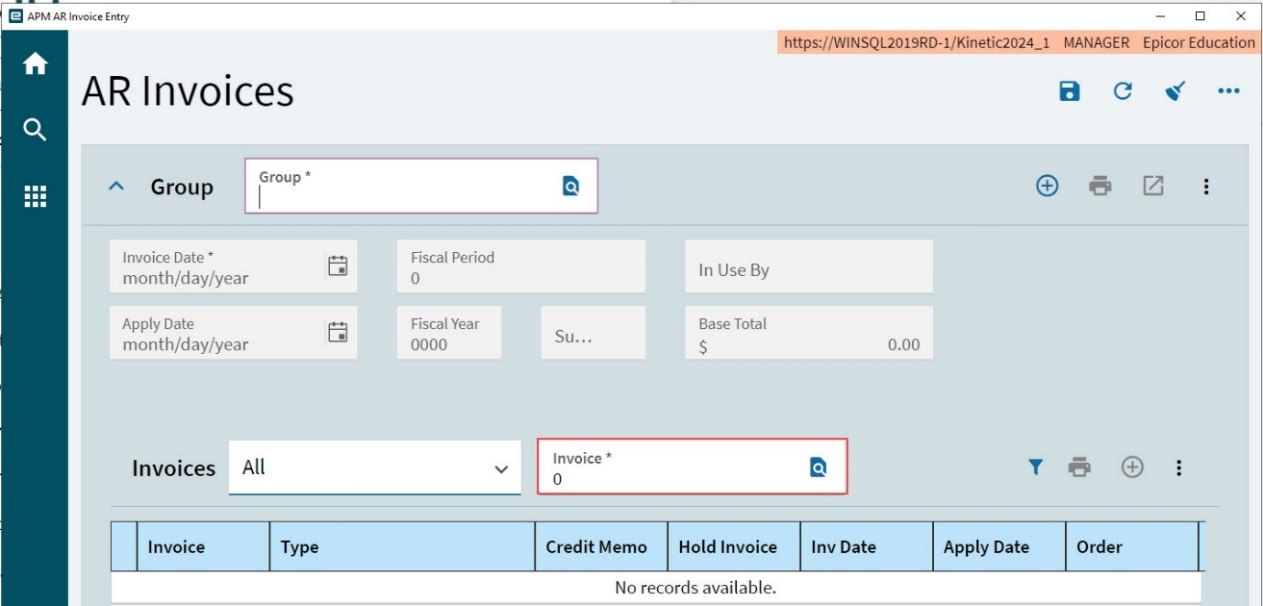
The selected invoice or credit memo appears on the Invoice Header card.
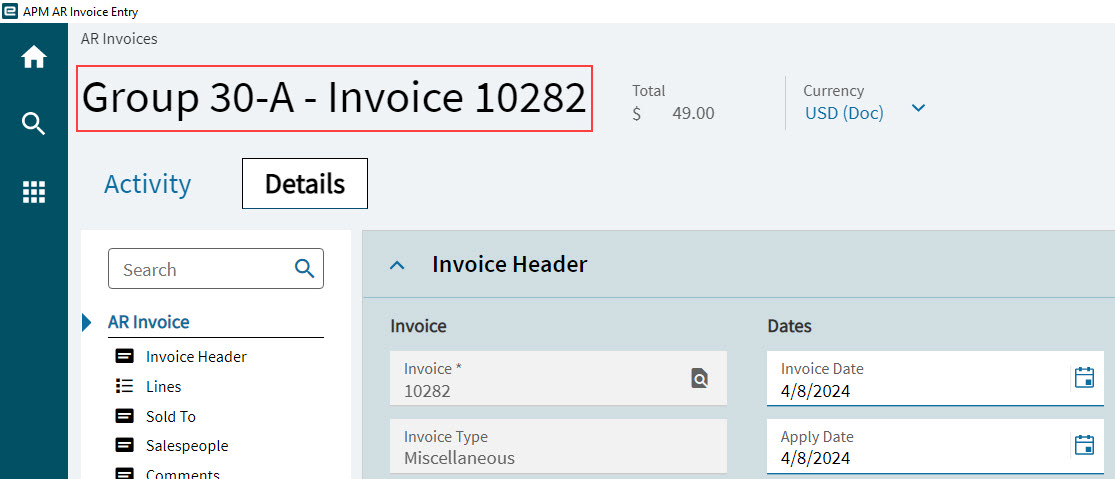
-
Review the invoice.
Posting an APM AR Invoice Group
Post the invoice group captured in the section above:
-
Select Invoice Header on the Navigation Tree to display the Invoice Header card.
-
Select Group Post
 on the standard menu.
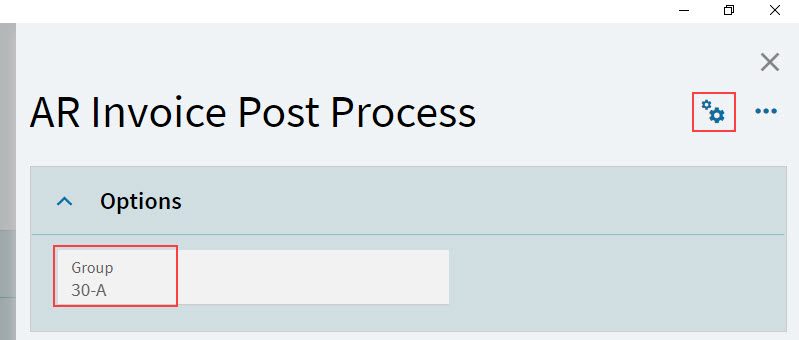
The AR invoice Post Process panel slides out, with the invoice group selected.
-
Select Process
.
The process is submitted, and the AR Invoice is posted.